Settings
The Settings Panel for Acorn is located under . There are five tabs labeled General, Guides, Advanced, Fussy Stuff, and Registration.
Note
The App Store version of Acorn does not have a Registration tab, as all accounting and purchasing is handled by Apple.
General
-
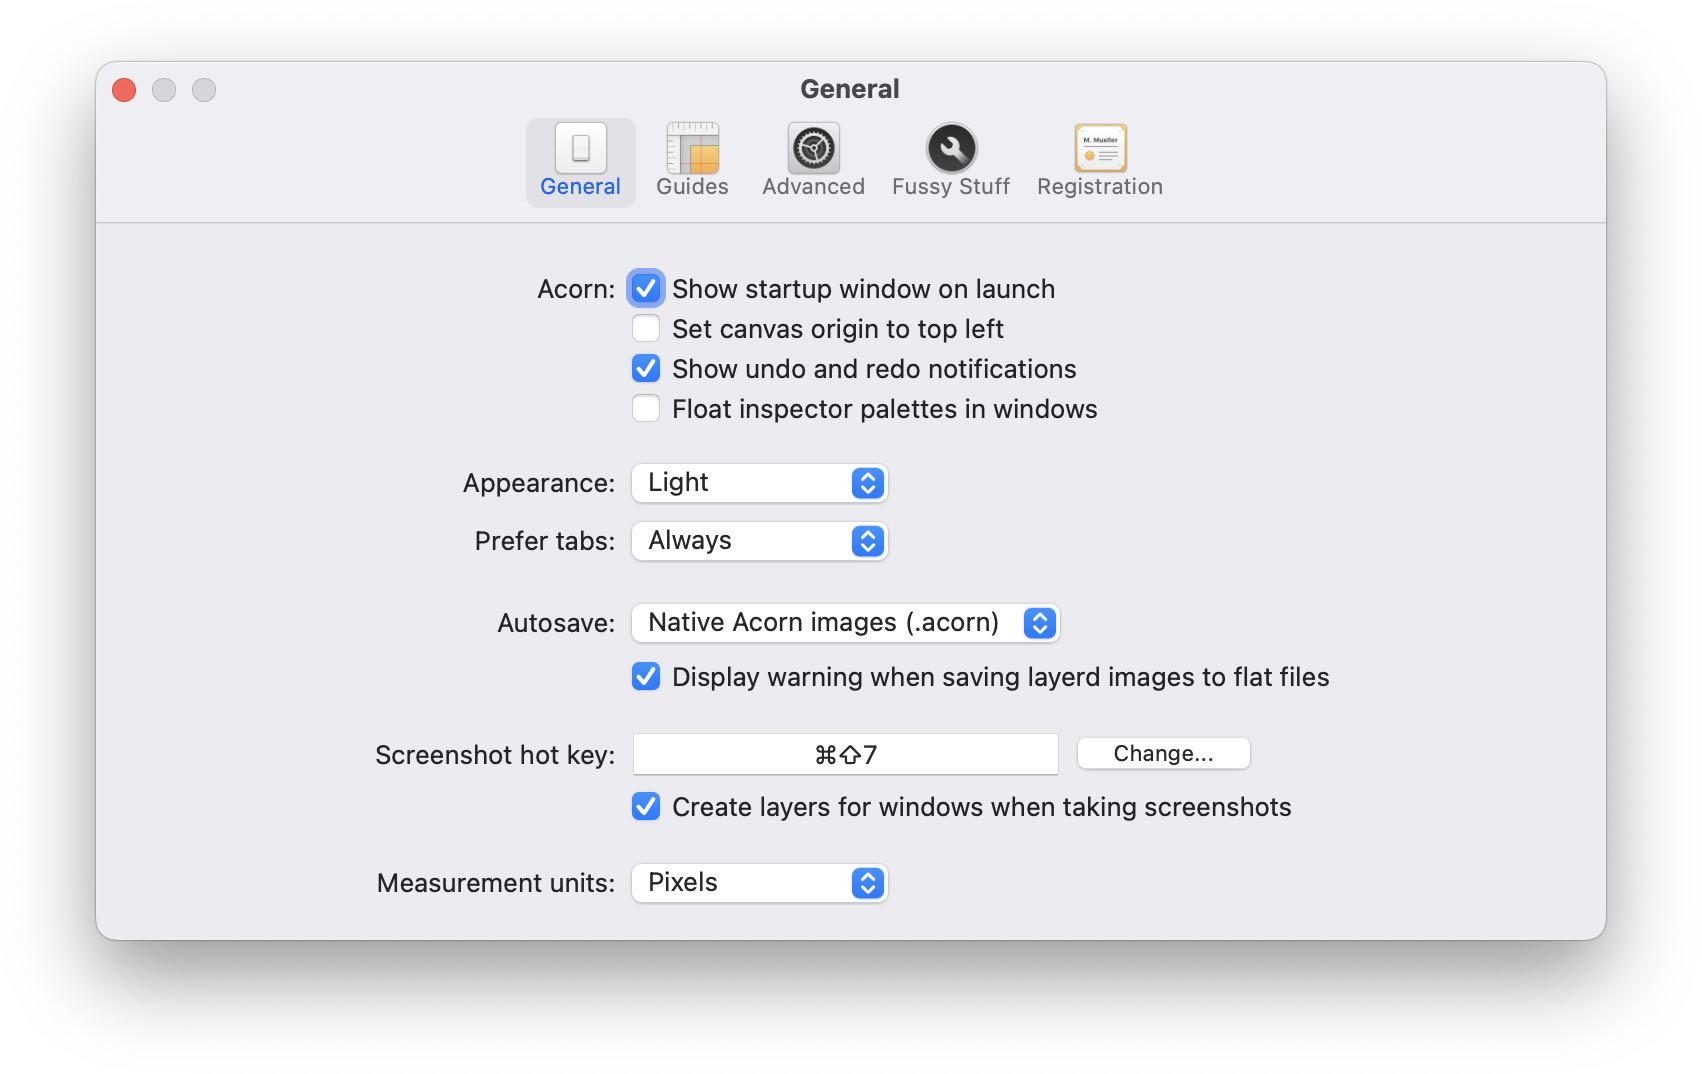
Show startup window on launch
When enabled, Acorn's startup window will appear when Acorn is opened (see Opening and Saving Images) -
Set canvas origin to top left
By default, Acorn places the origin (0,0) of an image at the lower left corner of the canvas. When this setting is enabled, Acorn will place the origin to the top left corner. -
Show undo and redo notifications
When undoing or redoing operations, Acorn will show a notification on the canvas informing you what was undone (or redone). -
Float inspector palettes in windows
When enabled, this setting will detach palettes from the image windows and have two floating palettes, shared between all open images. -
Appearance
This option (System/Light/Dark) sets the appearance of Acorn's UI. If set to System, then it will use whatever setting you have in macOS's Appearance System Settings. -
Prefer tabs
This option controls whether new images are opened up in tabs or not. If set to System, it will respect whatever you have set in the System Settings. -
Autosave
You have three options for automatically save support of images.- The first is , and this completely disables all autosaving of images.
- The next is , which only autosaves
.acornimages. This is the default option. - The final is , which will automatically save all image types, including lossy images such as JPEG.
When autosave is turned on it also enables Time Machine's support.
Important Information on Autosave
When autosave is turned on for all images, an image is automatically saved back to the original file. If the format of the image is in a lossy format (such as JPEG), then repeatedly opening and saving an image will introduce compression artifacts and degrade the quality of the image.
-
Display layers warning when saving to flat files
When saving an image in a format that does not preserve layers (such as PNG, TIFF, JPEG, etc.), Acorn will show a warning letting you know your layers will be lost. -
Screenshot hot key
Use this shortcut to take a screenshot of all open windows. A prompt for permission from System Settings may appear. This shortcut is global and will work while you are using other apps. In addition, there is an option to break out all open windows into their own layers. -
Measurement units
This is the default measurement unit Acorn will use when opening or creating new images. You can choose between Pixels, Inches, or Centimeters.
Guides
-
Snap To
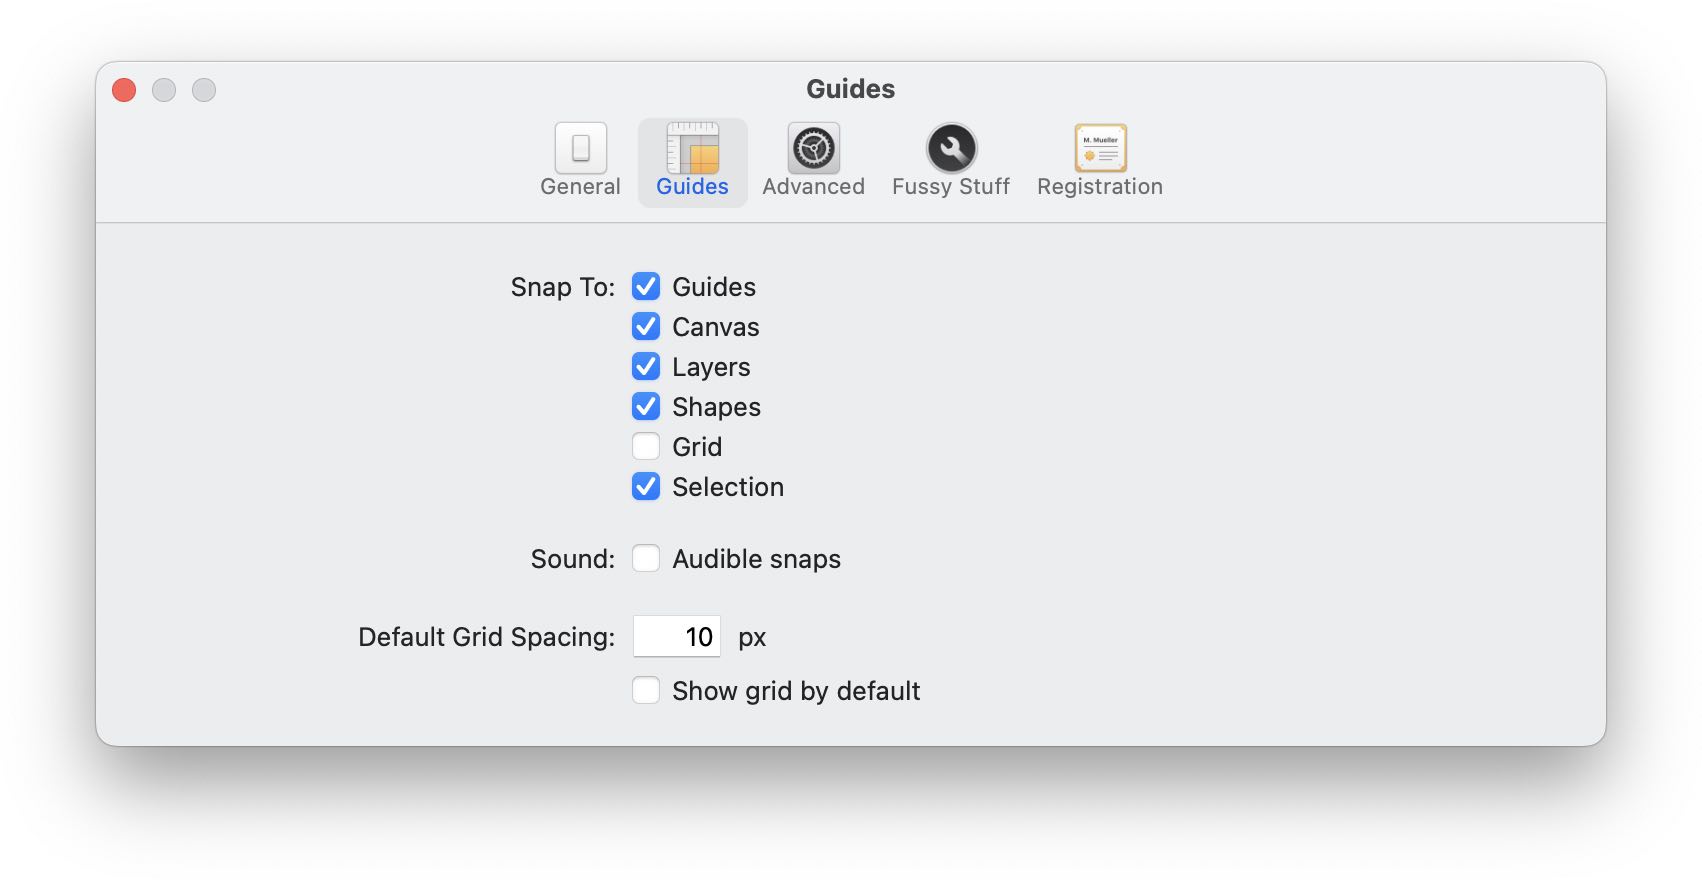
When this is enabled, moving shapes or layers will automatically lock (aka, "snap") to a horizontal or vertical point position when in close proximity. Acorn gives you the option to enable snapping selectively for guides, canvas, layers, shapes, grid, and selections. -
Sound
Optionally have Acorn play an audible 'tic' when a snap occurs. -
Default Grid Spacing
When opening or creating an image, this is the default grid width and height. Note: you can change grid settings per image via the menu item. Additionally, these settings are saved when you write your image in the.acornfile format.
Toggle Snapping Pro Tip
If you have snapping enabled and you would like to temporarily disable it, hold the Control key down after you begin dragging an object (such as a layer or shape) to toggle off snapping.
Advanced
-
Full Screen
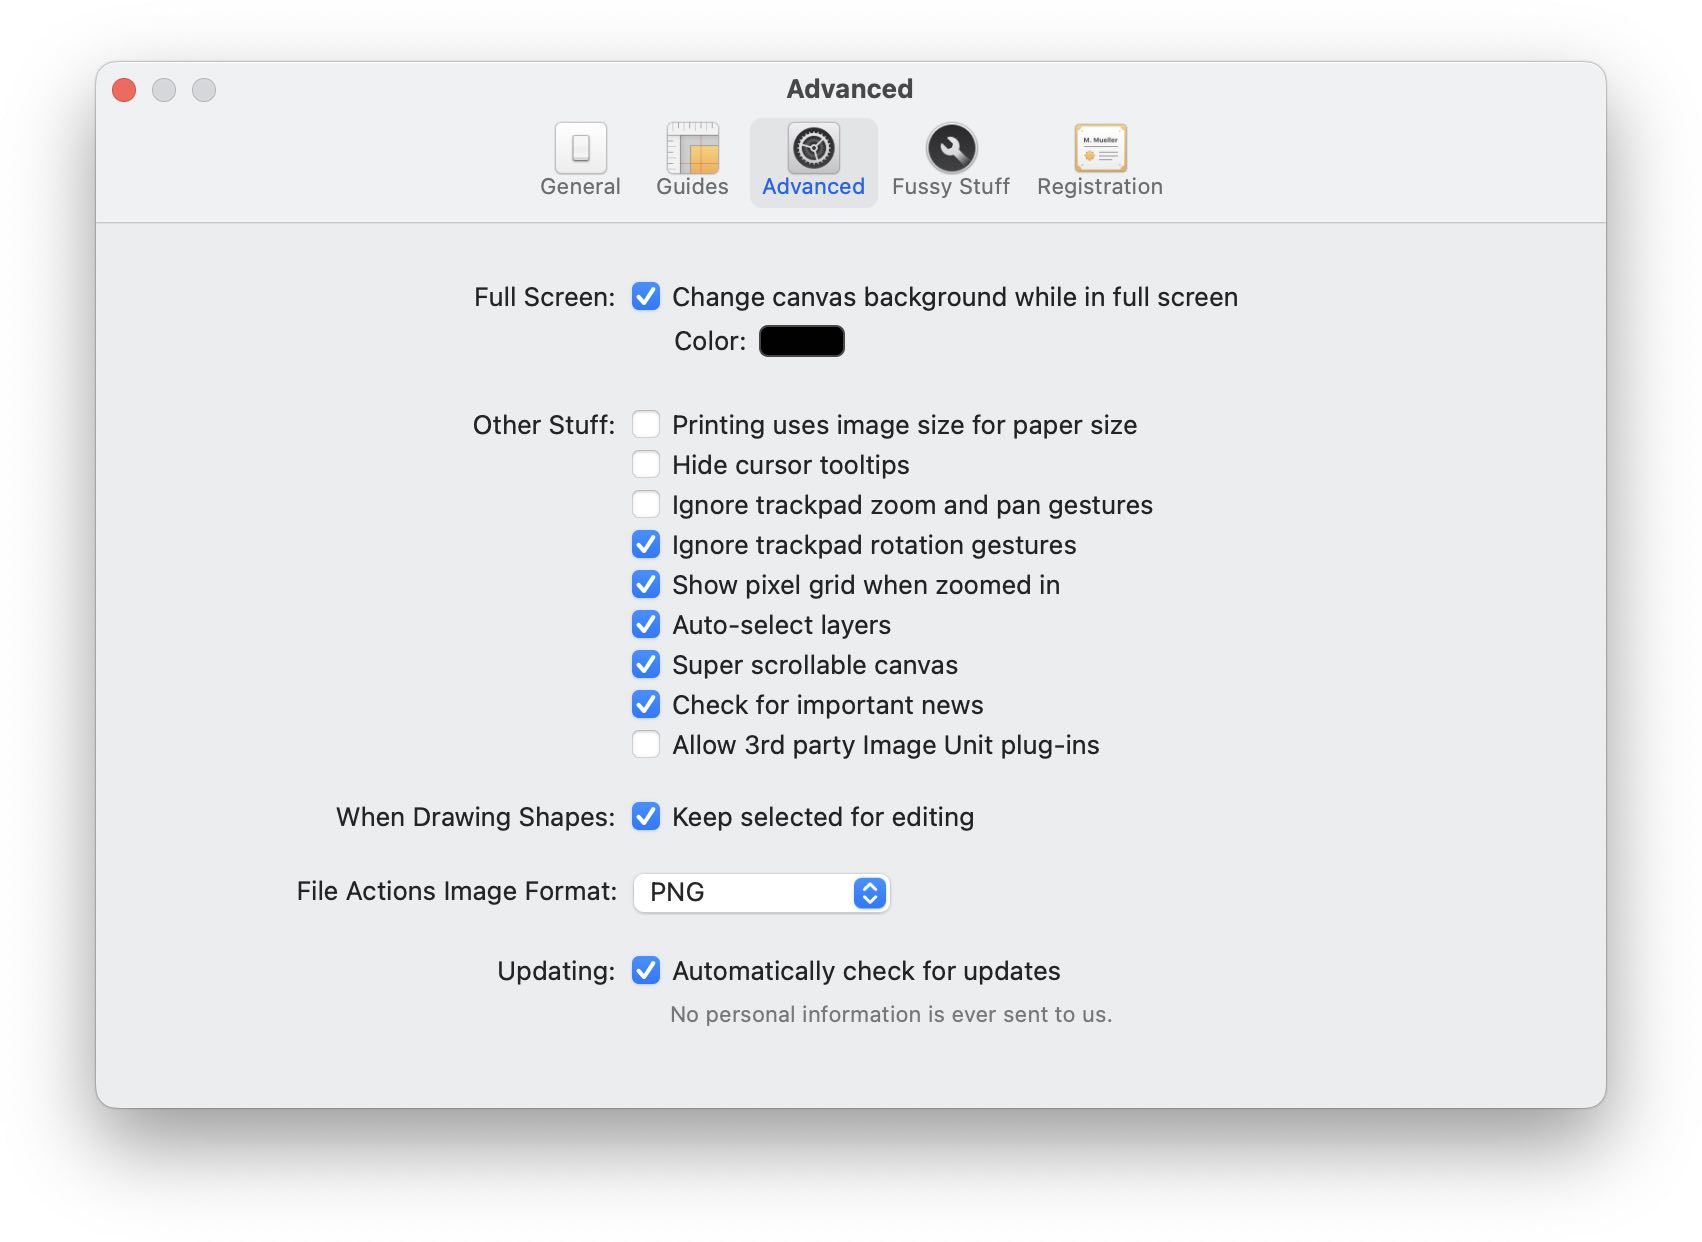
You have options under this section to have your canvas gutter (the area outside your image) change colors when transitioning to full screen. Use the Color option to change the color. -
Printing uses image size for paper size
When enabled, this tells Acorn to make the size of the image sent to the printer the same size as the actual image (as opposed to the size of the printer's paper). This is generally only useful when you are using the print panel to make a PDF of an image, and you don't want to have extra blank areas added to the PDF. -
Hide cursor tooltips
This option will hide the tooltips that appear when using various tools on the canvas (clone tool, selection hints, etc.). -
Ignore trackpad zoom and pan gestures
If you're using a trackpad and find yourself accidentally triggering two-finger zoom and panning, enable this option to have Acorn ignore those gestures. -
Ignore trackpad rotation gestures
Similar to the previous option, but targeted specifically towards two-finger rotating. -
Show pixel grid when zoomed in
With this enabled, Acorn will add thin lines between pixels when zoomed to around 1000% or more. Acorn adds a visible boundary between pixels for detailed work at this level. -
Auto-select layers
When enabled you can click through to another layer from the currently active one when using the move tool. When disabled, the move tool will only select items on the currently selected layer. -
Super scrollable canvas
When enabled, Acorn will allow you to pan your canvas all around the window, even if its contents don't fill the visible area. When disabled, if your image fits in the window it will always be centered in the canvas. -
Check for important news
When enabled, Acorn will occasionally phone home for important updates or announcements. If any are found, a news window notification will appear. No private information is ever sent. -
Allow 3rd party Image Unit plug-ins
If you have downloaded or created a 3rd party Core Image Plug-In (also known as "Image Units"), enabling this option will tell Acorn to find and make them available at startup. Acorn will need to be restarted for plug-ins to appear. -
When Drawing Shapes: Keep selected for editing
This option lets Acorn know whether to keep a vector object selected after drawing for further editing (via the tool inspector) or to deselect it. -
File Actions Image Format
When using the menu, this option decides what format to use when invoking the chosen action. -
Updating: Automatically check for updates
This option tells Acorn to occasionally check to see if there are any updates available and to auto-update to the newest version. This option will only check for updates for the current release. For instance, if you are using version 8.0.1, and version 8.0.2 or 8.1 is available, you will be prompted to update to that version (and it's free if you already have a license for version 8). However, major upgrades (such as from version 7 to 8) are not announced or auto-updated via this mechanism.
Note: This option is not available for the Mac App Store version of Acorn because updates are handled via Apple's App Store.
Fussy Stuff
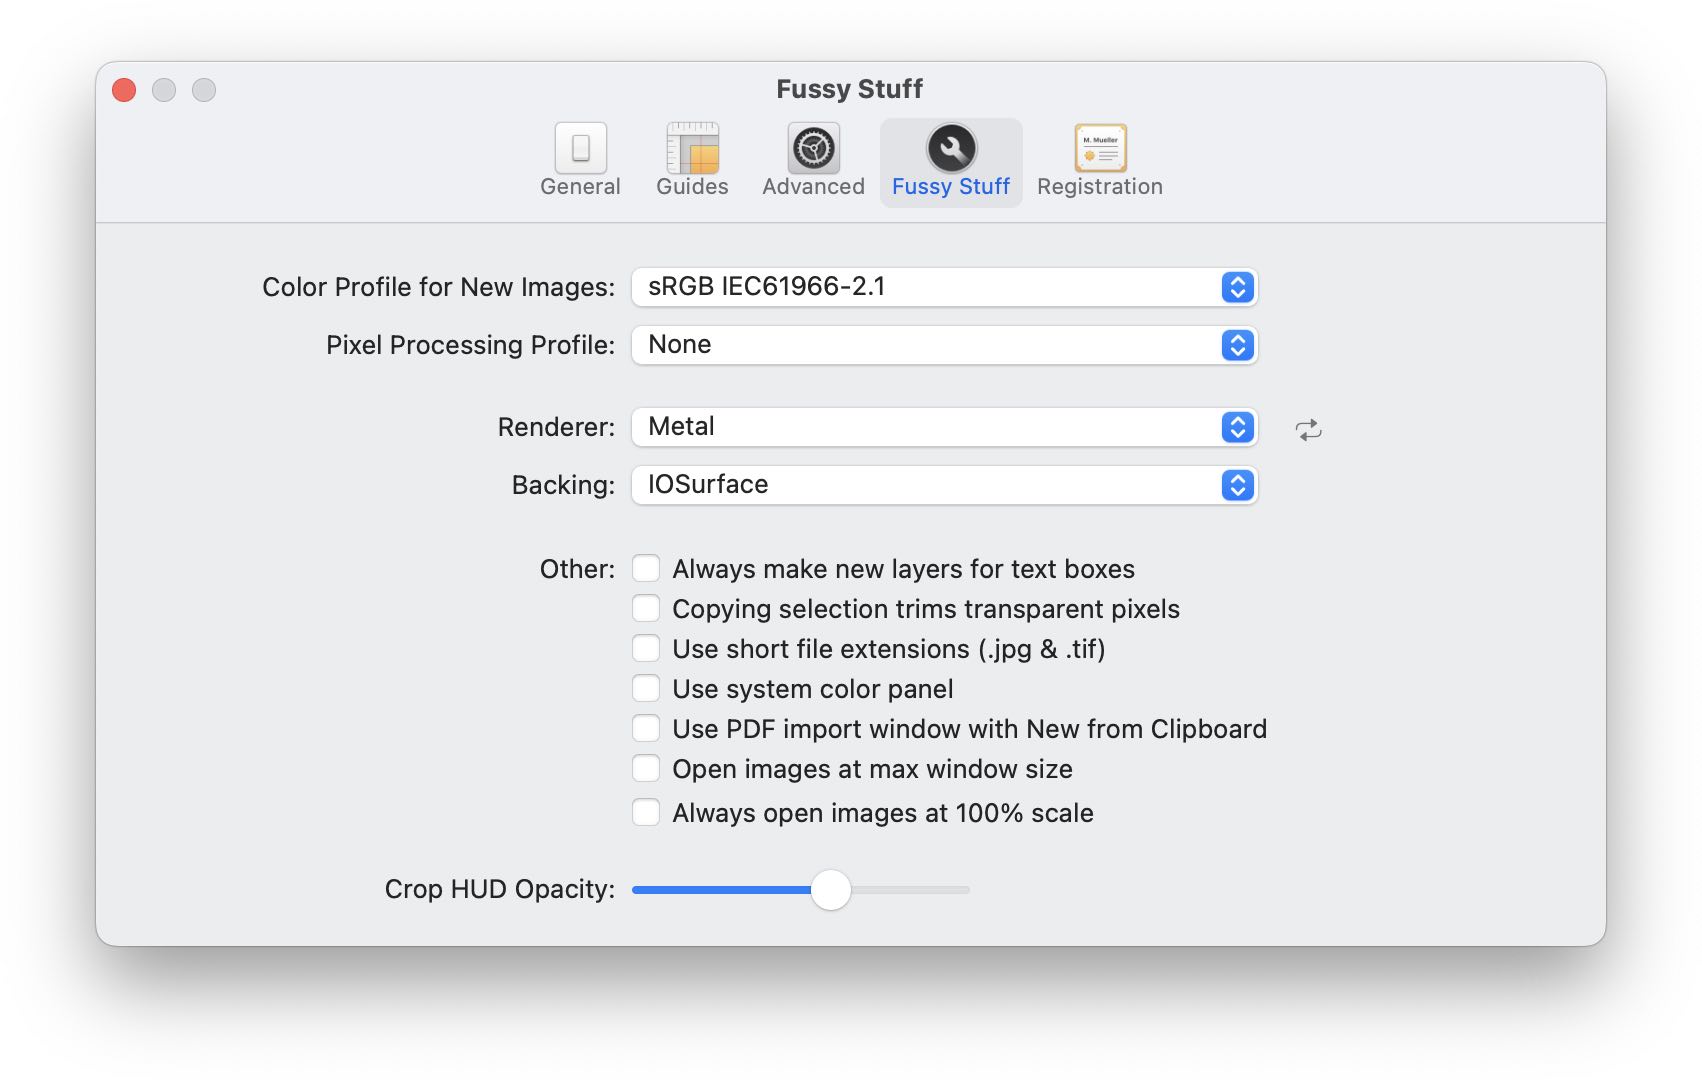
-
Color Profile for New Images
This option lets you set the default color profile (sometimes known as color space) for new images. Note: when an image is opened up and does not contain a color profile, Acorn by default will always use sRGB. -
Pixel Processing Profile
This is the default color profile that Acorn uses to process its filters and compositing (including brushing). Different profiles will be most noticeable when making gradients. You can always change the processing profile per image via the (⌘⇧K) menu. -
Renderer
This tells Acorn whether it should use GPU accelerated rendering (Metal) or CPU (Software) based rendering. Metal is the default choice and is much faster than Software. This setting is here for legacy reasons and is generally only useful for debugging GPU problems. -
Backing
This tells Acorn where pixel data should be stored, either on the GPU via IOSurface, or on the CPU via Software. If you are using an Apple Silicon based Mac, this options is mostly meaningless. If you are using an older Intel based Mac, depending on the size of images you are working with, one option might be faster than the other. -
Always make new layers for text boxes
When enabled, Acorn will place each text box on its own separate layer. Having text on distinct layers is behavior that older image editing software exhibited. -
Copying selection trims transparent pixels
If copying a layer or whole image where there are transparent pixels along one or more edges, Acorn will trim away those pixels when this option is enabled. -
Use short file extensions (.jpg & .tif)
With this enabled, Acorn will attempt to influence the macOS save windows to use short three-letter extensions for JPEG and TIFF formats. -
Use system color panel
By default, Acorn uses its own color palette to correctly handle color profiles of the current image (among other benefits). Enable this option if you would prefer to have the standard macOS system color panel.
System Color Panel Pro Tip
Holding down the Control key when clicking on a color wheel will temporarily bring up the system color panel. If you have the previous option enabled, holding down the Control key will instead bring up Acorn's color picker.
-
Use PDF import window with New from Clipboard
If you have PDF data on the Clipboard, using the menu item will bring up the PDF import window instead of directly pasting a new layer into the current image. -
Open images at max window size
When opening images for the first time, Acorn will make the window as big as possible to fit the entire image. -
Always open images at 100% scale
When enabled and opening very large images, Acorn won't zoom them down when they don't fit in the canvas window. -
Crop HUD Opacity
When enabled, you control the darkness of the Crop HUD (Heads Up Display) when using the Crop tool.
Registration
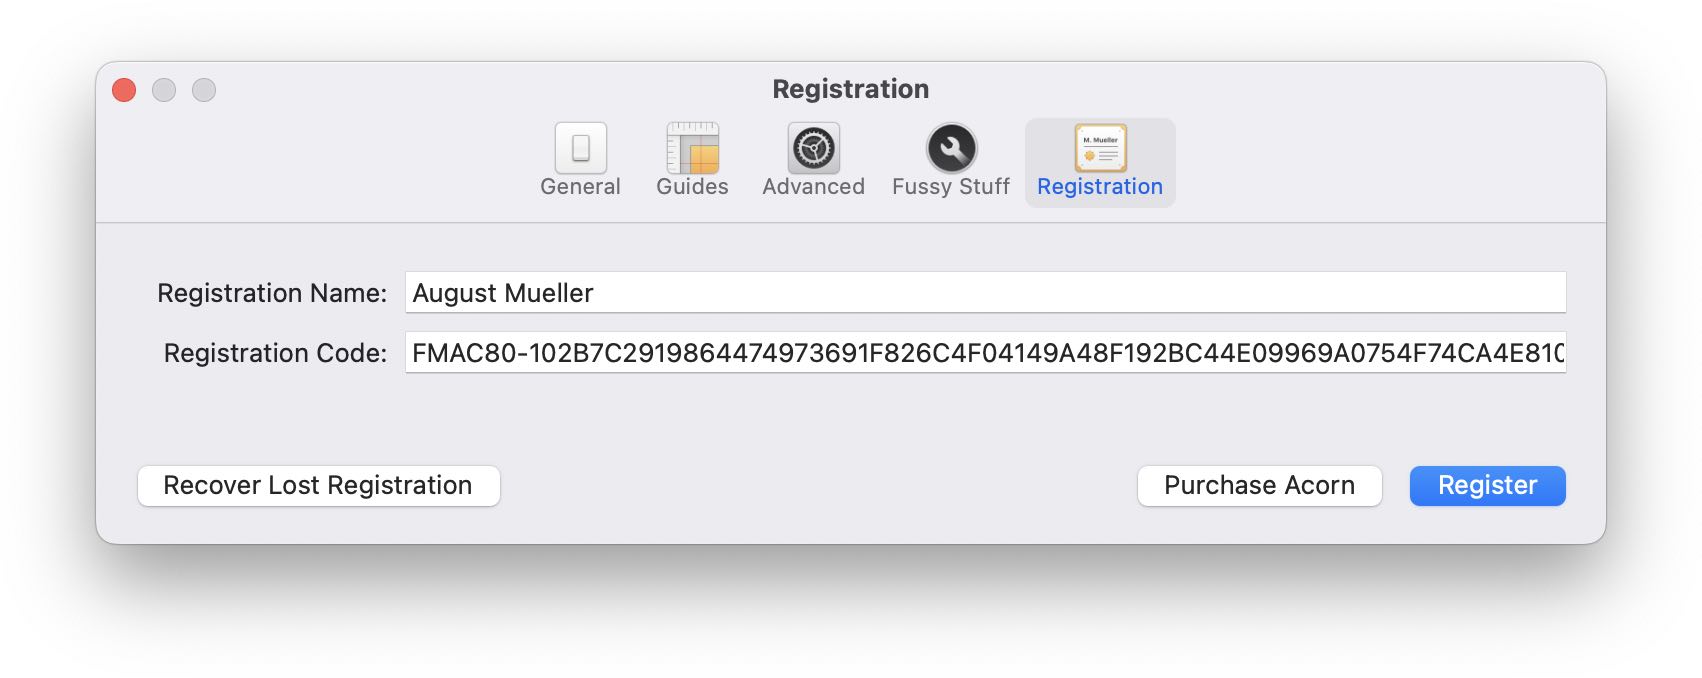
If you purchase Acorn directly from Flying Meat, this is where you enter your name and registration number for Acorn. Once your registration number is entered, it will be saved here for future reference. There is a link to the Flying Meat store where you can purchase Acorn, and a link to request lost registration numbers. The registration tab is not present in the Mac App Store version of Acorn.
